Charly Green offers Deer Stalkers some useful tips on how to achieve a quality photograph of a deer trophy.
 The biggest regret of my stalking career is my failure to capture tasteful and high quality trophy pictures during my early years as a deer stalker. Most of us live in a world where we are governed by cost and having one’s personal photographer on hand at the conclusion of a hunt is unrealistic. This should not prevent us from taking a beautiful picture of our trophy which can be treasured in the future.
Like many people, I enjoy looking at photographs of a hunt, the elation of success beaming across faces of the assembled party are the same the world over and a testament to the hard hours, days and sometimes weeks invested in that moment. I was recently given a book by David Chancellor simply entitled `Hunters`. This book is aimed largely at the North American market and has many references to sport both there and in South Africa. Rather than text, the book focuses on the story displayed through images. This really got me thinking. Whilst some folk do not enjoy viewing seemingly macabre pictures of deceased animals it is possible to make things more palatable through careful preparation of the trophy prior to taking the picture.
Visitors to my house are often fascinated by the taxidermy displayed there. I use the best artist for each species and I am particular that the trophy be displayed in a `warts and all` manner. This easily leads me to enter into rational conversation with interested people about the hunt and the ethics surrounding our sport. Once visitors understand why a mature trophy might have been removed from the herd I am able to move on and show them my catalogue of photographs without the instant recoil that might occur with the un-primed first-time viewer. The argument for shooting mature trophies was covered in my article on lowland Red Deer management and herd structure in the New Forest ( http://www.countydeerstalking.co.uk/Blog/the-management-of-red-deer-in-the-new-forest.html ).
As a group of sportsmen and women we all respect our quarry, this respect should not alter after the kill. This is clearly apparent in the regard that is shown for game on the Continent. In the UK we do not generally make a ceremony of the `laying out’ but we can emulate this through careful positioning of the beast and a more thoughtful approach to its depiction through photography.
We are not all gifted photographers so here are few simple tips to gaining a classic trophy shot for yourself and your guest.
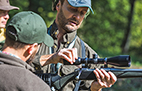
Once your beast is down try to identify the entry and exit of the bullet and assess the level of exterior damage caused. Then position your trophy with the `best` side toward the camera. The muzzle is often bloodied and can be cleaned up with a handful of long grass. The tongue can be protruding so I tend to remove it with a knife (my dog also benefits from this gesture). Any other exterior damage can be disguised by a well placed piece of scrub which blends well with the surrounding cover.
Consider now the sunlight, or lack of, when setting up your shot. It is preferable to have the sun on the photographer’s back but avoid any invasive shadow cast. On a dreary day find a nice open area in which to maximise the available light. Most modern cameras have automatic settings that capitalise on certain weather conditions and unless you are well versed in the use of manual controls I would stick with these.
You are now ready to `dress` the animal. Start by positioning both forelegs under the brisket and splay them slightly to provide balance to the unwieldy carcass. Next tuck the hind legs under in a natural pose as though the animal were couched. The hunter now sits or kneels behind his prize and supports the chest with his knees, holding the head behind the ears, turning it at the best angle to show off the animal’s prowess and so as not to detract from the antlers, horns or tusks.
When taking these pictures try to get as low to the ground as you can and if possible accentuate the trophy against the sky. This will draw the eye toward that main focal point before the viewer explores the wider picture.
Take lots of shots from various angles and don’t be afraid of trying new things with the lighting and camera settings. It’s easy to delete photo’s but very hard to recreate a moment.
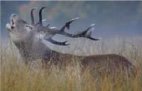
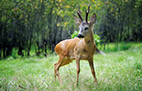
Here are three pictures of myself with the same animal showing the effects of the above when viewing the finished image.
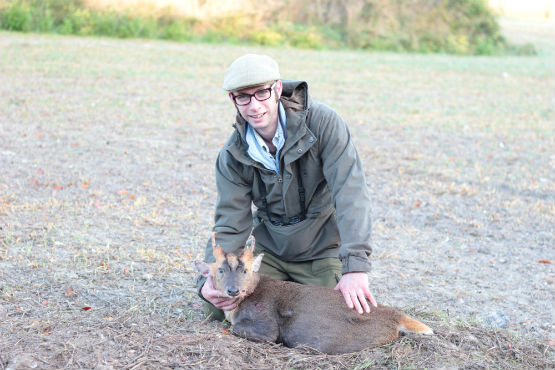
In this first image the buck’s antlers are lost against the backdrop of my coat and the scenery is rather dreary.
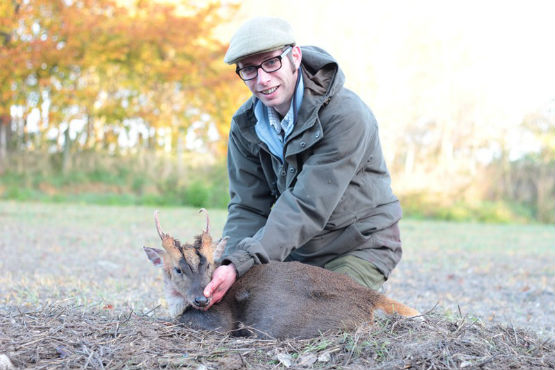
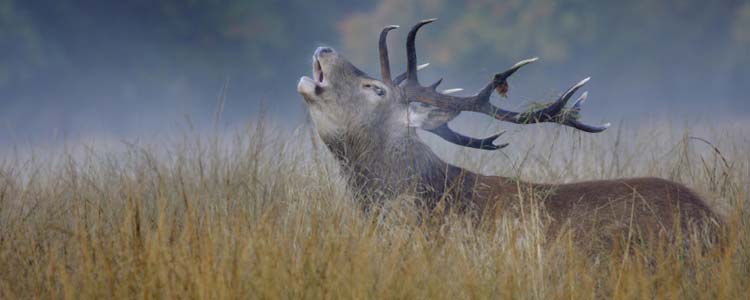
We can now see the antlers clearly against a more picturesque background with some atmospheric colouration although the two subjects, me and my quarry, remain disjointed.
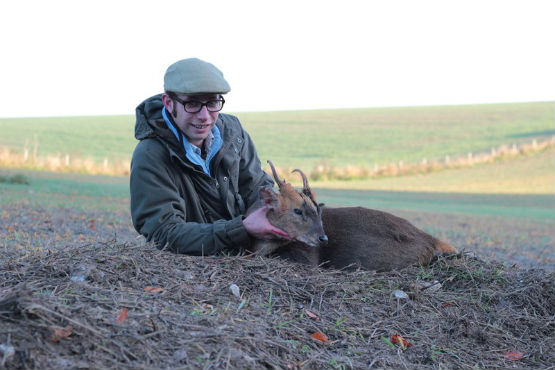
This final shot is the best, however it does have faults. I was unaware of the blood on my finger and could have made some small alterations to the angle of the buck`s head in order to show off his brow tines and the full curl of the main beams. However the subjects appear as one and the antlers are silhouetted nicely.
Whilst pictures featuring guest and guide are occasionally well presented I prefer the lone hunter portrayed with his or her trophy in the setting of the stalk. No gore or smugness, just genuine elation.
Many hunters are happy to depart with the cleaned head alone and will not wish to have their beast mounted by a taxidermist. A beautiful photograph taken with care and appreciation becomes part of the experience and costs a guide very little. It often yields repeat bookings and good quality recommendations as the client recognises the attention given not only to him but also to the quarry.
Charly Green can be contacted at: www.shavesgreen.com 07706 395979 or 02380 282941